I saw this tutorial on
Girl.Inspired. & thought to myself, “Hey, I can do that!” So last weekend I set out to try my own fabric-flower-making skills. These trendy little rosettes are so easy to make & could be worn as a headband, a hair clip, a brooch, or even a pin on your handbag.
I purchased all of my supplies at Hobby Lobby, & hardly spent anything to make a ton of these awesome do-dads. To make these rosettes you will need:
-Felt- 25 cents per sheet
-Headbands- 2 for $1.99
-Thread- $1.99, the color doesn’t actually matter because it will be covered up, so if you already have some, you can use that)
-Clips for brooches/hair- $3.99 for a pack of 25
-Fabric- select any pattern that you like. I got a ½ yard of fabric in 5 different prints for $11.95 (everything came off the clearance rack). To be honest, I don’t think you need more than a ¼ of a yard of fabric because I have a lot of leftover fabric.
-Glue gun- I already had one of these but they do sell them at HL if you need one.

It takes very little time to make these little guys; it took me about 15 minutes for each one. So let’s get started:
1. Cut your fabric 2 inches thick from selvage edge to selvage edge. Girl.Inspired. suggested 2 ½ inches thick but I found that left me with a HUGE flower that overpowered my head. (If it was too big for my head, than I could only imagine how big it would look on my nieces- my gorgeous guinea pigs. So to me smaller is better).
2. Fold your fabric in half lengthwise, with the print on the outside, & iron. I know, I know, I didn’t mention that this project would require you to iron, but trust me it’s worth it. Your strip of fabric should be about an inch wide now.  3. Sew a gathering stitch on the edge down the length of the fabric, pulling it tight. Now this is up to your preference: you can either sew down the FOLDED side OR the OPENED side. If you sew on the folded edge, the frayed side will be seen giving your flower a more vintage look. Alternatively, if you sew on the opened edge, the folded edge will be seen offering a more formal look. I like them both, but I think what I discovered last weekend was that I like the frayed look on solids, but not on prints with a lot of detail.
The flower on the left has a more vintage look & was sewn on the folded edge. The flower on the right is more formal, & was sewn on the opened edge.
This is a gathering stitch; it's very easy & a machine is not required.
4. Gather the fabric very tightly.

5. Starting at one end, wrap the fabric around itself tightly. As you are rolling, sparingly add drops of hot glue around the spiral.

6. Cut a small circle of felt & glue it to the middle of the bottom of the flower. Then work your way around bottom ruffle of the flower, gluing it to the felt. Now you can add a clip if you want to, or you can keep going to make a headband.


7. Cut another long thin piece of fabric (about an inch thick) & 2 smaller pieces. Glue the 2 smaller pieces of fabric on each end of the headband to cap it off. Then tightly wrap & glue (sparingly) the longer piece of fabric around the headband. Be careful with the glue, because if your finger accidentally touches the glue & then you touch the fabric without knowing, you will leave a white spot (I did this, oops!)
8. Decide where you want your flower to be position & glue it to your headband. Cut out another circle of felt & glue it to the back of the flower, sandwiching the headband in between the felt.

9. Tada!!!! That’s it! My first flower was a little on the big side, as I mentioned before, but remember you can always go back after your done to trim it shorter.


Isn't that so easy?! Have fun with this project! I can't wait to see the rosettes you make!


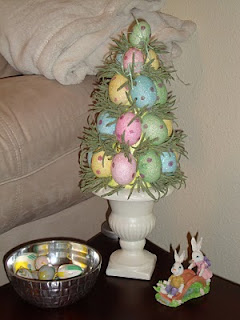

 We're so ready for Easter, can you tell? Hope y'all have a great week!
 After I painted it white, I used sand paper to distress the wood. Just to give you a point of reference, in this picture, the top half is distressed & the bottom half isn’t.
  The completed ‘H’ on our mantle.
 1. Sand down your birdhouse to make sure it is smooth (this is optional, but I did it). Stain the birdhouse & candle stick; I put on 2 coats of the walnut stain. (Please disregard the ‘H’- I will blog about that later)
 2. Once the stain has completely dried, attach the birdhouse to the candlestick using Gorilla Wood Glue. Now you’re ready to paint. I painted the entire pedestal & birdhouse white with 2-3 coats. Then I painted parts of the birdhouse lavender.
  3. Once the paint is dry, it is time to distress your birdhouse using the sand paper. I went over the corners pretty roughly because I figured that the edges of things get banged up more over time.

 I also went against the wood grain on the roof of the birdhouse.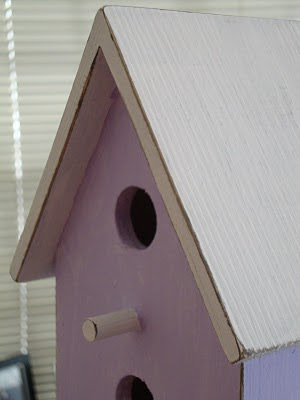
 And that’s it! You’re done! Wasn’t that so easy? I had so much fun making this; it feels old, but it’s brand new & something I made for our home. I just love it! Here is mine on the mantle.
  Ok you’re turn, go make one & please send me pictures of yours.


 Skinny Janes is the female lowfat version of Sloppy Joes. Like the new clever name I dubbed for this recipe? As much as I like the new named I gave the recipe, I think this was another one-time recipe.
  I got to use
  Skillet Penne with Sausage & Spinach was an awesome for a Friday night. We decided this tasted like pizza in a bowl; it was perfect for last Friday night. I added extra spinach, and used whole wheat noodles, & hot Italian sausage. Yum-o!
  I made the Quick White Chicken Chili late one night & tried it quickly before putting it in the fridge for lunches. It wasn’t bad but I wasn’t that impressed either. When Phil came home from work the next day the first thing he said was “that chicken stuff was great”. I went back to the fridge for a second sample & I have to say it was much better the next day. And we all know that a left-over compliment from me is BIG deal!
  Fast Oven-BBQ Chicken & 30-Minute Baked Potato- Maybe I’m a cheater (or lazy), but I have always cooked baked potatoes in the microwave. I don’t usually put them in the oven afterwards, so it was a *treat* this time because the oven gave them a nice crispy edge (which I’m sure most of you non-lazy cooks are familiar with). I had the potatoes in the microwave while I was browning the chicken & just put them in the oven when I put the chicken in the oven. We really enjoyed the BBQ sauce: it had a nice strong kick (because I forgot the maple syrup) but also a tangy after-taste. Both of these recipes were great & definitely fast.
  The only less than impressive recipe was Tortellini Soup. This dish had an extremely weird flavor; not bad, just weird. Phil asked me to never make this one again; I can’t disagree with him.
 So those were last week’s dishes. If I had to chose, I would say that the fajitas & the chicken chili tied for first place. Hope you all have a great week!


 Quick Maple-Glazed Pork Chops- I thought the pork chops were very tasty, though a little on the sweet side. They had a gourmet & ritzy flavor. I paired the pork chops with rice pilaf & peas. Very quick & easy!
  Skillet Tamale Pie- This was beyond delicious! Phil & I both agreed that this was our favorite recipe thus far. The seasonings melted together for an extraordinary burst of flavor with a delicious aroma. The cornbread topping was the easiest way to get that traditional tamale taste without killing yourself for it. For the cheese, I substituted 1 cup of cheddar for ½ cup cheddar & ½ cup habanero cheddar. I didn’t want to waste my left over cilantro from another dish, so I served the extra on top with the sour cream. I am 100% sure that I will make this dinner again.
  Spanish-Style Chicken & Rice- This was another quick favorite in our house. Some variations that I made to the recipe were: hot Italian sausage instead of chorizo, tumerick instead of saffron, & added 1 ½ cups of water to step 3 (when cooking the chicken & rice.) Phil also suggested adding some mushrooms, which I think I will do next time. This was really delicious & I’m still shocked at how fast it was to make.
  Salmon & Couscous Skillet Supper- This was ok, but I don’t think I will make it again. I used salmon steaks, omitted the lemon zest (which I’m glad that I did because it was already a little too citrusy<-- is that a word?), & added a cup of frozen peas. I will say that step 4 (toasting the fish) is the most important & really adds a lot of flavor to the fish. And as a precautionary tip, on step 5 really be careful to stir the couscous frequently (I don’t think high heat is really needed, but if you do use high heat be sure to stir)
  I also made some Baked Cup Custard from my new book by Mrs Foose (not associated with the cookbook club). Never having had custard like this before I have nothing really to compare it to, but I thought it was pretty good. It was a little bland, & I don’t think I would make it again, but it was decent.
 Alright that’s all I tackled this week, now onto a new week of recipes. Have a great week y’all!


