Saturday, September 17, 2011

Virginia Gal

These things come across Facebook every once and a while, and sometimes I just can’t resist myself- or my pride :-)

Tough girls come from Texas. Sweet girls come from Georgia. Prissy girls come from New York and then there's the VIRGINIA girls.  Fire and ice in our blood. We can ride a 4 wheeler, be a princess, throw a left hook, pack heat, bake a cake, fish w/the boys, love with a passion, and if we have an opinion, you bet you're gonna hear it. Virginia Girl
I think that pretty much sums me up :-)
Have a great weekend y’all!
xoxo Darby

Friday, September 16, 2011

Destruction Before Reconstruction: Chalkboard Messenger

As I was making plans for our new master bedroom, chalkboard paint kept catching my attention.  It seems to be very popular with DIY-ers (I think I just made up a new word).  The few projects I have used chalkboard paint on, I have loved the final product.  So “If it ain’t broke, don’t fix it”

I purchased the cheapest frame I could find at Hobby Lobby ($3) because I knew it wasn’t going to look that way for long.  I already had regular paint and chalkboard paint at home from previous projects.  Again, this is another super cheap-o project.  My favorite kind of project :-)

When I got the frame home, I didn’t even bother taking out the corny picture that came in the front of the frame.   I put a couple coats of chalkboard paint directly onto the glass.  I don’t remember exactly how many coats, but I’m guessing 3-5ish.DSC05616-2

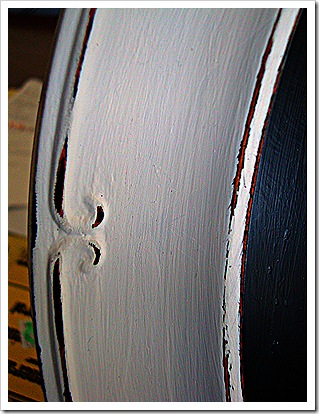
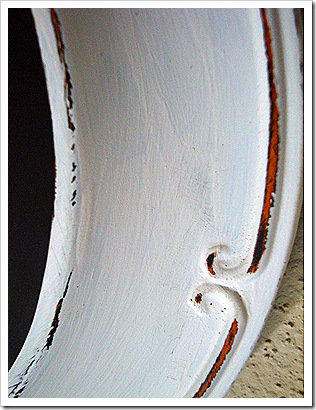
I painted the frame white (again probably 3 coats), and then got out the sandpaper.  Have you noticed I’m a little obsessed with distressed objects?  Well here I go again.  Once all the paint (white and chalkboard) were dry I sanded down the edges of the frame to give it more of a personal, antiqued look.  (You always want to make sure your paint is dry before you start sanding so that you don't have your distressed chunks making your paint lumpy <--- like all those technical terms?)DSC05652-2DSC05650-2DSC05666-2

Check this baby out!DSC05649-2

Now, mounted to the wall, right above the light switch when we walk into our room, we have a little chalkboard to write sweet messages to each other.  Cute, right?  Messages from Phil always make me blush and give me butterflies :-)DSC05661-2

xoxo Darby

Wednesday, September 14, 2011

What I'm Lovin' Wednesday: My Brain

I had a couple fMRI’s in August and I was ecstatic to get to see my brain.  I mean I know I have one, otherwise I couldn’t be writing this post, or even breathing for that matter.  And I can’t count the number of brains I have seen in my own laboratory or even when I worked in an Operating Room at a hospital in Virginia.

This was different though. 

This was not someone else’s brain.

This was not a text book picture.

This was not a picture I put into a lecture powerpoint.

This is my brain :-)

This is a sagital view of my entire brain (looking from the side).  You can see the bone structure of the skull and spine, the spinal cord, and various other brain structures- I promise, I wont name them all ;-)Brain 1
This is a coronal view (as if you were looking straight through my face)Brain 2
The next 3 views are horizontal views (as if you were moving down in a lateral motion from the crown of my head down towards my neck).  I posted these 3 photos so that you could see how the brain changes as you move through it.  In the 1st picture you can see the cortex (the wrinkles), in the middle photo you see fewer wrinkles and the lateral ventricles (the black in the middle that almost makes and ‘x’- I’ll also point out that in the coronal picture above the lateral ventricles look like the gray scoop in the middle.  It’s interesting to see how structures look differently depending on the view: coronal versus horizontal), and by the 3rd photo you can see my eye sockets and my “hindbrain.”Brain 8Brain 6Brain 5
Isn’t it gorgeous?!

This is me in all my nerdy glory!

This is me unable to turn off the teacher gene.

This is me :-)
xoxo Darby

Monday, September 12, 2011

Destruction Before Reconstruction: Nightstand & Hamper

Remember this?  This was my nightstand before I got all DIY-crazy. It’s not hideous, just boring.  I was ready for a change.DSC05615-2

I removed the hardware, sanded everything down, and applied some primer.DSC05671-2

Next came the white paint (White by Valspar).  I applied 2 coats, and it was already starting to look better to me.DSC05675-2

So far in the room, I had added a lot of creams and white, but since Phil said it was starting to “look like an insane asylum” (and he was right), I decided to add another demission to the color palette with gray, but to continue to incorporate  my favorite damask pattern that was on the bedding. I purchased a stencil and gray paint at Hobby Lobby.  (When you do this, make sure the your base paint is dry, and lightly use scotch tape to secure the stencil in place so it doesn’t move while you’re painting.  Use a measuring tape to get your design precisely where you want it.  I used a sponge-tipped brush for the stenciling for an even coat of paint.)DSC05680-2DSC05741-2DSC05742-2

Once the stencil was dried and I sealed everything, I replaced the hardware.  I was thinking of replacing the hardware, but in the end decided that I still liked the original too much to replace it.  So here is my new nightstand. DSC05747-2DSC05749-2

What do you think?

~~~~~~~~~~~~~~~~~~~~~~~~~~~~~~~~~~~~~~~~~~~~~~

Ok so moving onto something minor with a huge impact on our new bedroom: the hamper.  I guess I never felt the need to upgrade from the hamper we used in college.  Yep, we were still using the same one.

But wait, it gets better.

Because Tomlin kept getting into our less than sturdy hamper, we rigged it to the wall with some old curtain hardware.  Oh yes, we’re classy like that.DSC05831

I hate to admit this, but I searched for a hamper longer than I searched for anything else in this room.  I had no idea hampers could cost so much and still be so small!  I’m not buying a tiny hamper! That would mean I would have to do laundry more so all of our clothes wouldn’t be spilling over the sides. No way! 

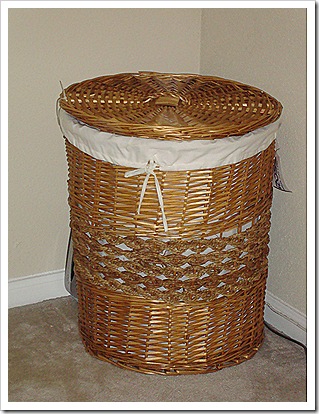
I finally found this lovely hamper at Ross.  I don’t think it was exactly what I was looking for, but then again, I really didn’t have a clue what I wanted so it worked out perfectly.  With the colors and style I think it matches the room & the shabby chic feel I was going for (and it was only $25)!DSC05835

Are you getting a feel for our new room with the new bedding, curtains, decorations, lamps, nightstand and hamper. At this point I thought it was already a million times better than it was previously.  But of course, I didn’t stop here :-)

xoxo Darby

Friday, September 9, 2011

Destruction Before Reconstruction: Lamps & Curtains

The next project to tackle in our bedroom was this lamp.  It’s so plain!  I know, I know, I typically like plain, but this was too plain even for me.

This lamp on my nightstand I got back in college, but in an effort to be financially savvy, I thought of a way to change the lamp without having to purchase a new one.DSC05615-2I dusted off the lamp shade and covered it in burlap ($3.99/yard at Hobby Lobby) using my glue gun.  I painted the base white and voila, a new lamp!  Since I already had glue and white paint, this project only ran me $1.56!DSC05640-2

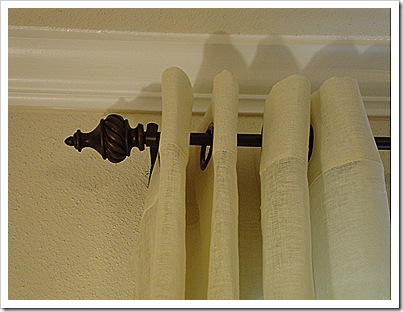
Before moving to our current home, I had curtains hanging in our bedroom.  When we moved here, the “maid” never hung the curtains (shame on her!).  I purchased long cream colored linen curtains and a new curtain rodDSC05647I read that hanging curtains close to the ceiling makes the room look taller.  We already have pretty tall ceilings (15 feet), but I decided it would make the room look even bigger if I hung them high.  I asked Phil to hang them 3 inches below the crown molding and I think he did a great job.  What do you think?DSC05648

After the bedding and armoire, and lamp and curtains, we were already feeling like the room had made a complete 180.  But you know me; I couldn’t just stop there.  I had to keep going :-)

xoxo Darby

Wednesday, September 7, 2011

What I’m Lovin’ Wednesday: September Apples

Basket of Apples
I was reading my buddy Martha’s September issue when I ran across something I had to share with you.  A Florida State University study reported that women who ate apples daily for a year dropped LDL (bad) cholesterol by 23% and shed 3 lbs.  Wahooo!!Considering that it’s officially apple season I thought I would try to inspire you with ways to incorporate apples into not only your diet, but also your decorating and treat time :-) 
To find your local apple orchard, visit pickyourown.org.Apple car
xoxo Darby

Monday, September 5, 2011

Destruction Before Reconstruction: Bedding & Armoire

In July I opened the suggestion box for ideas on our master bedroom renovations.  (See our hot mess of a bedroom here).  It was the last room in our house to get renovated, and I seriously lacked direction.  Thankfully, I received a ton of help and encouragement from all of our wonderful followers and I appreciate it so much.  You all gave me a lot of direction and you will see many of your suggestions incorporated into the final product :-)

After getting all of your fabulous ideas, I made a thousand few to-do lists and worked my way through August.  The goal was to do as many DIY projects as I could and to get everything completed by August 22, when school started.  I am proud to say that I finished a week earlier than I anticipated and we’re in love with our new bedroom.

I decided (and double-checked with hubby of course) that I would go for a rustic romance/shabby chic/French countryside vibe.  (I feel extra “teachery” when I have to describe my bedroom with adjectives  like this lol).  As I said before, I wanted to make sure that our room was peaceful and light, so the colors I chose were light gray, cream, ivory, and white.  This month I will be revealing all of the projects that went into our new bedroom.  I hope you like them as much as we do!

Since almost everyone said to figure out the bedding situation, I realized that the bedding had been a reoccurring problem that needed to be fixed first before I dove into the rest of the room.  In the past, I had been getting bedding that I was satisfied with but nothing I really loved.  I needed to buckle down and get something I loved so that I didn’t have to keep doing this every few months.  Long-term this will be more cost efficient.  To jog your memory, here is before, boooooooooooo!DSC03457-2

Here is after, Yaaaaaaaaaaaaaaa!Bedroom Model-2(The above picture is not my actual bedroom, but it is a picture of the new coverlet and the cream/white model I was designing the room after; pictures to follow) 

Instead of buying a set where I was only satisfied with parts of it, I built my own set so that I made sure to love every piece:

Standard Shams: Vintage Chic Scallop Shams

European Shams: Palais Royale Hotel Collection

Sheets: Therapedic Always Fresh

Throw pillow 1: Madison Square Toss

Throw pillow 2: Lenox Neckroll Toss

Throw pillow 3: I already had

Bed Skirt: Smoothweave

Comforter: Damask Stripe White

Coverlet: Lenox

Ok, moving on, I had to dig pretty deep, but this is a photo of the armoire when we first moved in back in 2008.   I know you’re lovin’ my boom box ;-)28. Bedroom-2

I decided not to paint this piece of furniture but instead to just clear the “trendy” boom box off the top.  I did some shopping around our house and brought back an old milk bottle, medicine jar, picture of Phil and I, bird cage, bird candle, and some books. This look didn’t cost me anything, and it’s still a refreshing new look that matches my adjectives- I think ;-)DSC05820-2

After these first two projects were done, even though they were really small and easy, we could already start to feel the difference they made.  Phew!  We were on the right path! 

So what do you think?

Does it seem relaxing?

Can you see my adjectives reflected in these simple changes?

Stay tuned for more master bedroom projects!

xoxo Darby

Thursday, September 1, 2011

BBQ Weekend

Phil and I went to a fabulous BBQ a couple weeks ago with some friends.  We found it humorous that even though it was a BBQ, the only person outside was the grill master lol.  Considering how hot it has been in Houston this year (setting a new record for number of days in a row with temperatures in the triple digits- not including the heat index! Yuck!) everyone stayed in the wonderful A/C!  Praise the Lord for air conditioning!!!

In Virginia, where I grew up, BBQ is generally pork; however, this is not the case in Texas.  Beef is the staple BBQ ingredient.  I don’t enjoy the beef BBQ as much, so I was thrilled that the main course was pork BBQ!  Labor day is one of the last BBQ weekends before the fall kicks off, so I wanted to share the 2  dishes I brought to the BBQ with you before this weekend.

For an appetizer I brought Jalapeno Poppers.  This was a new dish for me when I moved to Houston, but I quickly developed a taste for them.  I first mentioned them when we were teaching a singles bible study, but since then I have really worked out my recipe.

Ingredients:
  • 18 ripe jalapenos
  • 2 packs cream cheese, softened
  • 2 cups sharp cheddar, shredded
  • 6 green onions, chopped
  • 2 packs bacon
  • toothpicks
  • barbeque sauce (I use honey BBQ)
Directions:
  1. Preheat oven to 350 degrees.  Line the inside of a broiler pan with aluminum foil (You’ll thank yourself for this later).
  2. Slice jalapenos in half and scrape out the seeds and membranes (I strongly recommend wearing gloves for this step).  Soak jalapenos in a bowl of cold water for about 15 minutes, then soak again for another 15 minutes with fresh cold water.   This will help the jalapenos cool off a little bit.
  3. Mix cream cheese, cheddar, & onions, and scoop filling into jalapenos.
  4. Cut bacon strips in half and wrap each jalapeno with a half strip of bacon, and stick a toothpick through to hold in place.
  5. Put jalapenos on broiler pan with the toothpicks in the broiler pan cracks.  This will prevent the jalapenos from falling over.
  6. Brush about a teaspoon of barbeque sauce on each popper and “pop” them into the oven.  Cook until the bacon looks done, about 30-45 minutes.
DSC01924 My friend Danie suggested this macaroni and cheese recipe by the Neely’s (who are super cute), and it was fabulous.  I definitely recommend it.DSC05799DSC05801 Looking back at both of these recipes, I realize the pork-overload at this picnic!  haha thank goodness we don’t eat like this everyday!
  Happy Labor Day weekend!
xoxo Darby
Related Posts Plugin for WordPress, Blogger...